
A desk cable grommet is a fitted pass-through that lets cables drop through the desktop instead of trailing across it, keeping cords tidy and out of the way. For most home and office desks, a 50–60 mm (roughly 2 in) brush or snap-in grommet handles the job well. Before you cut anything, check underside clearance and confirm your monitor arm's cable routing so you don't block it later.
TL;DR:
- Most single-monitor desks can effectively use a 50-60 mm grommet to accommodate one power, one HDMI, and one or two USB cables.
- Larger setups with multiple monitors or bulkier bundles may require 80 mm or rectangular 100 x 50 mm grommets to fit multiple cables and power strips comfortably.
- Proper placement involves positioning the grommet 70-100 mm from the rear edge and avoiding interference with lift columns and crossbars for safe and functional routing.
- Drilling should be done with a hole saw, pilot bit, painter's tape, and safety goggles, ensuring underside clearance and correct positioning before cutting.
- For renters or those avoiding permanent modifications, clamp-on cable management accessories offer an alternative to drilling and can be paired with existing grommets.
Table of Contents
- What is a desk cable grommet, and which type suits you?
- What size grommet do you need, and how many cables fit?
- Where should the grommet sit on your desk?
- How do you install a desk grommet safely?
- How does a grommet work with your monitor arm and cable trays?
- What should you check before buying a grommet?
- Quick checklist before you shop or drill
- Why planning placement first saves you a redo
- Where ULTI fits into your cable-management plan
- Sources
- FAQ
What is a desk cable grommet, and which type suits you?
The standard industry term is "desk grommet" or "cable grommet," though you'll also see it called a hole cover for cables, a cable pass-through grommet, or simply a desk cable cover. All describe the same thing: a ring or sleeve fitted into a hole in the desktop that lets cables run through the surface neatly rather than dangling off the back edge.
Which type you pick depends on how often you swap cables and how much you care about finish.
- Plastic/snap-in grommets cost the least and fit into most pre-cut or newly drilled holes without tools beyond a hole saw. Good for budget desks or rental setups.
- Brush grommets use a ring of bristles instead of an open hole, which keeps dust and draughts out while still letting several cables move freely. They're the best trade-off when you need a tidy finish but still want to add or remove cables often, according to CableOrganizer's buying guide.
- Metal or trim-ring grommets come in low-profile finishes such as brushed bronze, matte nickel, and chrome, with sizes typically running 1.57 in, 2 in, and 2.5 in, according to Electriduct's metal grommet range. They cost more but hold up better on desks that get moved or knocked.
- Powered grommets build a mains outlet or USB port straight into the housing. They're convenient but need proper electrical certification, covered in the buying guide below.
- Retrofit two-piece kits split into a top and bottom half that clamp around the desktop, so you never have to flip an assembled or hollow-core desk to fit them.
What size grommet do you need, and how many cables fit?
Retail grommets cluster around a few standard diameters, and picking the right one comes down to your actual cable count rather than guesswork.
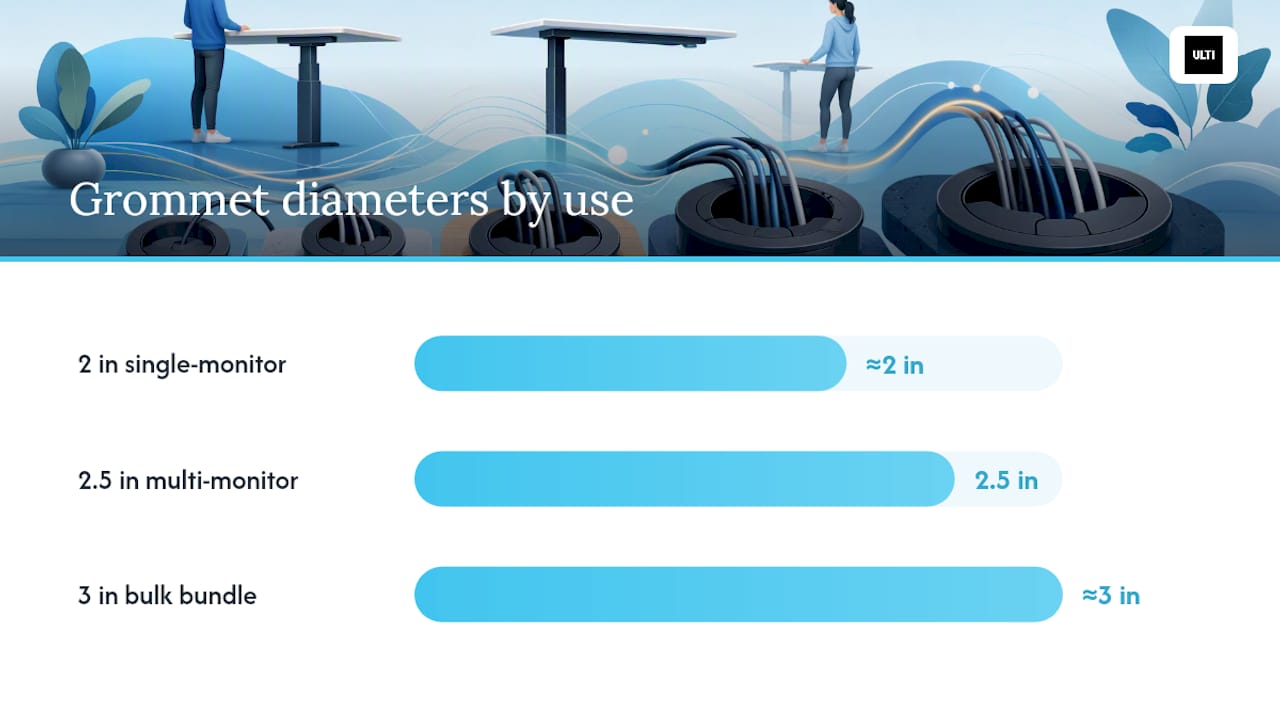
- 50–60 mm (≈2 in): the workhorse size, and the most common diameter sold across major retailers, according to Lowe's desk grommet catalogue. Comfortably fits one power lead, one HDMI cable, and one or two USB cables.
- 80 mm (≈3.15 in): suited to dual-monitor or gaming setups with a power cord, two video cables, an ethernet cable, and a couple of peripherals.
- Rectangular 100 x 50 mm: useful where you're bundling six or more cables, or running a mix of power strips and network cabling through one cutout.
Pro Tip: *Bundle your existing cables with a soft tape measure before you buy.
Comfortro's sizing guide recommends the 2 in default for most single-monitor desks and stepping up to 2.5–3 in for bulkier, multi-monitor bundles. If you're unsure which way to round, size up: a slightly loose grommet still looks tidy, but an undersized one will pinch cables and crack under strain.
Where should the grommet sit on your desk?
Placement matters more on a height-adjustable desk than a fixed one, because the frame moves and the cutout needs to clear moving parts throughout the full range.
- Set your offset from the back edge. A cutout placed 70–100 mm from the rear edge keeps cables close to the wall or power strip without crowding the desk's structural lip.
- Match the offset for corner or L-shaped placement. If you're routing cables through a corner return, use a similar 70–100 mm offset from the side edge as well as the back.
- Clear the lift columns. On electric standing desks, keep the hole at least 100 mm from any lifting column to avoid drilling into a moving part or its cable channel, a clearance also recommended by Vvenace's guide to grommets on standing desks.
- Clear the crossbars. Leave 40–50 mm minimum from any underside rail or crossbar, since cutting through one weakens the frame and can foul the height mechanism.
- Adjust for your monitor setup. A single monitor usually needs one central-rear grommet; dual or ultrawide displays often work better with the grommet offset toward whichever side holds the PC tower or power strip, and L-shaped desks may need one grommet near each working zone.
Good placement on a moving desk means aligning the cutout with a rear cable tray or vertical cable chain, so cords stay short and protected through every height change rather than stretching and snagging, as detailed in Cum alegi plinta potrivită pentru ascundere cabluri.
How do you install a desk grommet safely?
You need a hole saw sized to your grommet, a pilot bit, painter's tape, a flat backing board, and safety goggles. Most jobs take under 30 minutes once you've confirmed placement.
- Mark and measure twice. Confirm the centre point against your clearance rules from the placement section above before you mark anything.
- Tape the drill point. Two or three layers of blue painter's tape across the mark reduce laminate chipping when the saw bites in, a technique detailed in Deskguide.
- Drill a pilot hole. This gives the hole saw's guide bit somewhere to centre without wandering.
- Cut slowly at low RPM. Let the hole saw do the work rather than forcing it; a slower cut with a sharp blade tears the surface far less than rushing it.
- Deburr and test-fit. Sand any rough edges, then dry-fit the grommet before final assembly.
Drilling from the underside of the desktop where possible, rather than through the top face, further reduces visible tear-out on veneer and laminate surfaces.
For assembled or hollow-core desks, a two-piece retrofit kit clamps from both sides so you never have to flip the desktop, a solution DeskGuide.pro also covers for exactly this scenario. Powered grommets split into two installation paths: plug-in units are DIY-friendly, while hardwired units feeding directly into building wiring should go to a licensed electrician. The mistakes that cause the most rework: drilling straight over a frame rail, skipping an underside clearance check, and forgetting to pre-thread monitor-arm cables through the grommet before mounting the arm.
How does a grommet work with your monitor arm and cable trays?
Most grommet-mounted monitor arm bases clamp down flush against the desktop, which blocks the hole completely once the arm is fitted. Manufacturer manuals are explicit about this: route your power and video cables through the grommet first, then mount the arm base, because backing out an installed arm to thread a forgotten cable is a genuinely tedious fix, as Humanscale's grommet mount manual warns.
- Confirm the arm's bolt and cable-passage dimensions against your grommet's inner diameter before drilling anything.
- Align the grommet with any rear tray or vertical cable chain so cables run a short, direct path rather than looping.
- Leave a small service loop of slack at the grommet so height or angle adjustments don't tug on connectors.
Pro Tip: If you're not committed to a permanent cutout yet, ULTI's clamp-on cable-management spine and arc tray accessories route cables along the underside without drilling at all, which suits rented offices or desks you don't want to modify.
What should you check before buying a grommet?
A grommet that looks right in a listing photo can still be the wrong fit once it's on your desk. Run through these checks before you order.
- Confirm the base diameter matches your planned hole size and that the grommet's body depth clears your tabletop thickness (many budget desktops run 18–25 mm).
- Match the finish to your desk: brushed metal and chrome trims read as premium, while moulded plastic disappears better on painted or laminate surfaces.
- For powered grommets, look for UL or ETL safety listings and enough underside depth for the housing and strain relief, per CableOrganizer's buying advice; a surge-protected module is worth the small premium.
- Check the seller's returns policy and shipping coverage for your market, and confirm compatibility with any monitor arm or cable tray you already own or plan to add.
Quick checklist before you shop or drill
- Hole diameter matched to cable count, not guessed
- Tabletop thickness checked against grommet body depth
- Underside clearance confirmed, especially near lift columns
- Powered vs passive decided, with certification checked if powered
- Finish chosen to match desk material
- Monitor-arm cables pre-threaded before final mounting
Why planning placement first saves you a redo
Most grommet regrets come from cutting before checking clearance, not from picking the wrong finish. Once you've measured your cable bundle and confirmed the underside is clear of rails and lift columns, the actual cut takes minutes. Some standing desk manufacturers build cable routing into their desks and pair them with clamp-on trays precisely so fewer customers need to drill at all, and the ones who do get it right the first time.
— ULTI
Where ULTI fits into your cable-management plan
If you'd rather skip drilling altogether, ULTI's workspace accessories range includes clamp-on cable-management spines, arc trays, and cable trays designed to route cords along the underside of any desk, standing or fixed, without a single hole saw involved. They're built to work alongside a grommet if you've already fitted one, or as a standalone fix if you'd rather not touch your desktop at all. Clamp-on spines suit height-adjustable desks well, since they move with the frame instead of anchoring to a fixed point. Browse the accessories collection online or visit the showroom to see how the trays and spine fit together on a live setup before you commit to a purchase.
Sources
- Humanscale grommet monitor-arm installation manual
- Deskguide
- Electriduct — metal desk grommets
- What is a desk grommet & how do I choose one? — CableOrganizer
FAQ
What are grommets on a desk?
A desk grommet is a ring or sleeve fitted into a hole cut in the desktop that lets cables pass through the surface neatly instead of hanging off the edge.
What is the purpose of a cable grommet?
It routes and protects cables at a single fixed point, stopping them from fraying against sharp desktop edges and keeping the workspace visually tidy.
How can I prevent cables from falling off my desk?
Fit a grommet close to your power strip and monitor arm, then use a clamp-on cable tray or spine underneath to catch the slack, so nothing pulls loose during height adjustments.
What is the cable hole in a desk called?
It's commonly called a desk grommet, cable grommet, or cable pass-through; some listings also use "hole cover for cables" or "cable organiser for desk."
What size grommet should I buy?
A 50–60 mm (≈2 in) grommet suits most single-monitor desks; step up to 80 mm (≈3.15 in) or a rectangular 100 x 50 mm cutout for multi-monitor or heavily bundled setups.